While my website doesn’t have much going on, I’ve always wondered if there’s any visitor, and if there are, I’d love to know little more about them. To satisfy my curiosity, I need to setup an analytics service that captures the website’s traffics and analyzes the overall demography. After the search for a free analytics service, it boils down to 2 options:
- Use a ready to go service such as Google Analytics.
- Run your own server and host any of the open-source services such as Open Web Analytics, Plausible, Matomo, and etc.
I went with Matomo as it seems to be recommended the most, and their documentations, in my opinion, are much better than the alternatives. Now that we know what we’re doing, let’s dive into the process of integrating Matomo into my website.
![]()
Setup a virtual machine with your favorite cloud provider
To use Matomo for free, you have to host the service yourself, otherwise you can use their SaaS that cost a few bucks a month. For self-hosting, you need to get a virtual machine up and running, and it’s reasonable to consider the 3 most popular cloud service providers:
After taking a quick look at their websites, we see that each of these cloud services provides a free tier in one way or another. Out of these 3, only Google Cloud offers an always free tier that gives free usages to their shared virtual machine (VM) instances for indefinitely, whereas AWS and Azure only offer a 12-month free period for their VMs. Because we want to keep the cost as low as possible, and we expected that there’s not much traffics to the website, the offers from Google is much more attractive (visit Google Free Compute to learn more).
Create a virtual machine with Google Cloud Compute Engine
If you have made up your mind and chosen to use Google Cloud, head over to Google Cloud to create your Google Account. Once you have an account, go to the console for Compute Engine to start creating a VM instance. If your new to Google Cloud, there are several more steps that have to be taken before you can create a VM instance like creating a billing account and enabling the Compute Engine API. We won’t go into details and show how to go through these steps since there are clear and precise guidances from Google themselves as well as several existing tutorials online.
When creating a new VM instance, it’s important to remember to choose a region, a machine type, and a disk size that are eligible for Google’s free tier. In my case, I chose
- Region: us-west (Oregon)
- Machine: e2-micro
- Disk: 30Gbs standard disk
One problem with Google Cloud console is that even though the machine is eligible for the free tier, they do not indicate whether the chosen option is free and still show a price estimate. You just have to make sure that you choose the correct options and that the instance does not run more than 720 hours per month.
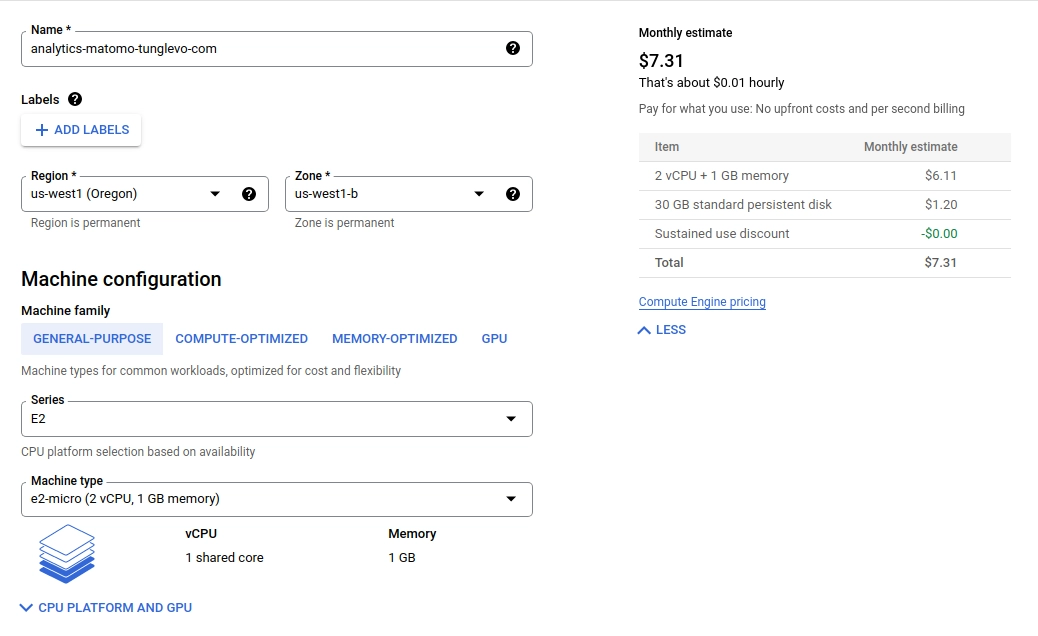
Google Cloud Compute Engine configuration
Additionally, you can choose any operating system that you like because it does not matter which one you choose (I went with Ubuntu 20.04 LTS Minimal).
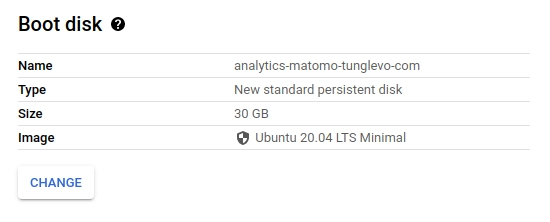
Google Cloud Compute Engine operating system
Furthermore, we need to allow HTTP and HTTPS access to the virtual machine by enabling the firewall access
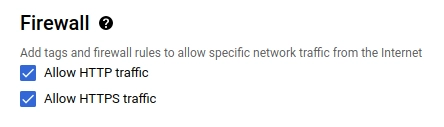
Google Cloud Compute Engine firewall rules
Install Matomo on your newly created virtual machine
Get the prerequisites
Once your virtual machine is setup and running, we can now access the server via SSH (or any other method of your choice) and install the prerequisites.
The official list of requirements is available at the official website for Matomo.
Because I’m on Ubuntu, I’ll be using apt-get to install the all the requirements and recommended packages.
$ sudo apt-get update
$ sudo apt-get install php php-curl php-gd php-cli php-mysql php-xml php-mbstring php-fpm mysql-server
By default, apache2 is installed on the Ubuntu image thus we don’t need to install it.
Furthermore, we need unzip so we can extracted the files for Matomo and an editor to configure the server later on.
$ sudo apt-get install unzip vim
Setup the database
We then have to setup MySQL with a new database for Matomo and create a new user that is granted with all the necessary permissions to that new database.
An official guide for setting up the database is also provided by Matomo.
One thing to note is that we must run the mysql command with the correct administrative privilege, otherwise our access to the database will be denied.
We first start a new bash session with admin privilege and run the MySQL client within the authorized bash session.
$ sudo bash
$ mysql
Create a new database in MySQL.
mysql> CREATE DATABASE matomo_db_name_here;
Create a new database user (remember to change the username and password).
mysql> CREATE USER 'matomo'@'localhost' IDENTIFIED WITH mysql_native_password BY 'my-strong-password-here';
Grant the newly created user the necessary permissions.
mysql> GRANT SELECT, INSERT, UPDATE, DELETE, CREATE, INDEX, DROP, ALTER, CREATE TEMPORARY TABLES, LOCK TABLES ON matomo_db_name_here.* TO 'matomo'@'localhost';
Grant the user the FILE global privilege so reports will be archived faster.
mysql> GRANT FILE ON *.* TO 'matomo'@'localhost';
Download and setup Matomo with Apache server
With the database setup, we can now download Matomo and setup the Apache2 server so we can host Matomo.
We first download the files for Matomo.
$ wget https://builds.matomo.org/matomo-latest.zip
Create the directory where the server hosted content well be stored.
$ sudo mkdir -p /var/www/matomo
Extract the downloaded archive.
$ sudo unzip matomo-latest.zip
Copy the extracted files to the server hosted directory.
$ sudo cp -r matomo/* /var/www/matomo
Change ownership of the server hosted directory.
$ sudo chown -R www-data:www-data /var/www/matomo
Change access permissions for the directory.
$ sudo chmod -R 755 /var/www/matomo
Use your favorite editor to create a virtual host configuration for Matomo.
$ sudo vim /etc/apache2/sites-available/matomo.conf
Enter the following configuration to tell Apache2 to serve our content located in the folder at /var/www/matomo/ (remember to change ServerName and ServerAdmin to your specific use case).
<VirtualHost *:80>
ServerAdmin admin@example.com
ServerName example.com
DocumentRoot /var/www/matomo/

    <Directory /var/www/matomo>
       DirectoryIndex index.php
       Options FollowSymLinks
       AllowOverride All
       Require all granted
    </Directory>

    <Files "console">
       Options None
       Require all denied
    </Files>

    <Directory /var/www/matomo/misc/user>
       Options None
       Require all granted
    </Directory>

    <Directory /var/www/matomo/misc>
       Options None
       Require all denied
    </Directory>

    <Directory /var/www/matomo/vendor>
       Options None
       Require all denied
    </Directory>

    ErrorLog ${APACHE_LOG_DIR}/matomo_error.log
    CustomLog ${APACHE_LOG_DIR}/matomo_access.log combined

</VirtualHost>
By default, Ubuntu enabled a site for the welcome page of Apache2, and we would like to disable that default site.
$ sudo a2dissite 000-default.conf
Enable the site configuration for Matomo.
$ sudo a2ensite matomo.conf
Enable the Rewrite module for Apache2.
$ sudo a2enmod rewrite
Restart Apache2 for the changes to take effects.
$ sudo systemctl restart apache2
Assign a domain pointing to our virtual machine
After the last step, we now have access to Matomo through the Apache2 server but we can only access it through the external IP of the virtual machine.
To fix this, we go over to our domain settings and register an A-record pointing to the external IP.
Once that finishes, we can now access the server through our specified domain name.
It’s crucial that you have done this before setting up HTTPS in the later step.
Setup HTTPS
Before running the setup for Matomo, one last thing that we would like to do enabling HTTPS so that we don’t leak our credentials.
We’ll be using Let’s Encrypt which creates a certificate for our domain at no extra cost.
The process for getting the certificate and setting it up with Apache2 is completely automated through Certbot.
First we use snap as guided to install certbot.
$ sudo snap install core; sudo snap refresh core
$ sudo snap install --classic certbot
We then create a symlink to the binary of certbot so we can use it anywhere.
$ sudo ln -s /snap/bin/certbot /usr/bin/certbot
Finally, we invoke certbot with the --apache option to tell certbot that we’re using an Apache server so it knows how to configure the server.
$ sudo certbot --apache
We then fill in all the options prompted by certbot and have a working HTTPS server at the end of the process.
Installing Matomo
After we have done all the hard work above, it’s now time to install Matomo. Head over to their 5-minute installation guide, follow the steps, and we are done!
Adding Matamo script to Hugo
Once the server is up, our website can now send back requests to the server for Matomo to track and analyze all the incoming traffics.
I used the script option to include a small piece of Javascript in the <head></head> tag of the website that gets loaded on every single page.
<!-- Matomo -->
<script>
  var _paq = window._paq = window._paq || [];
  /* tracker methods like "setCustomDimension" should be called before "trackPageView" */
  _paq.push(['trackPageView']);
  _paq.push(['enableLinkTracking']);
  (function() {
    var u="//example.com/";
    _paq.push(['setTrackerUrl', u+'matomo.php']);
    _paq.push(['setSiteId', '1']);
    var d=document, g=d.createElement('script'), s=d.getElementsByTagName('script')[0];
    g.async=true; g.src=u+'matomo.js'; s.parentNode.insertBefore(g,s);
  })();
</script>
Once it’s included, we have a working analytics dashboard for our site!